


HOW TO ACHIEVE THAT FLAWLESS LOOK IN A VARIETY OF WAYS.
Floor wastes may seem like an insignificant detail when it comes to building a beautiful home, but it’s one of the key areas required to both perform and increasingly; seamlessly integrate with the aesthetics of the space as well. And it’s not just that. Floor wastes or drains have come a long, long way in recent years in terms of their designer looks and much like the most sought-after tapware can change the whole look of a kitchen or a bathroom vanity, so too can the choice of a drain.
We have some images from our projects that feature both linear and round grates we’d like to show you. Each was a considered choice in keeping with its surroundings, yet it was the astute approach to execution too that created their flawless finish. It’s all about ‘top of trade’ in terms of detail because even the smallest defect will actually have a knock-on effect on the substrates surrounding them as well as their overall functionality.
ROUND ONES OFF THE SHELF AT BUNNINGS featured IN BANJUP
The secret to the round drains which are generally 50mm or 80mm is to cut the pipe about 5mm lower than the desired floor level and place the cap back on. You should then screed over the top and burnish.
After the floor is polished and sealed, use a small diamond drill bit (ideally the ones that go in a grinder) to grind the pvc about 3mm lower than the polished concrete. The standard grates from Bunnings are the exact size of the pipe cap both 50mm and 80mm and these can be neatly siliconed into place.
They also come in a range of finishes like the gunmetal grey Matt finish which is my favourite and the type we used at Hausen Court, Banjup.
Be sure to orientate the grate square off the wall, toilet or entry.


Now, the linear grates are much more difficult to execute and have a totally different process. You ready?
These can be done in two different ways.
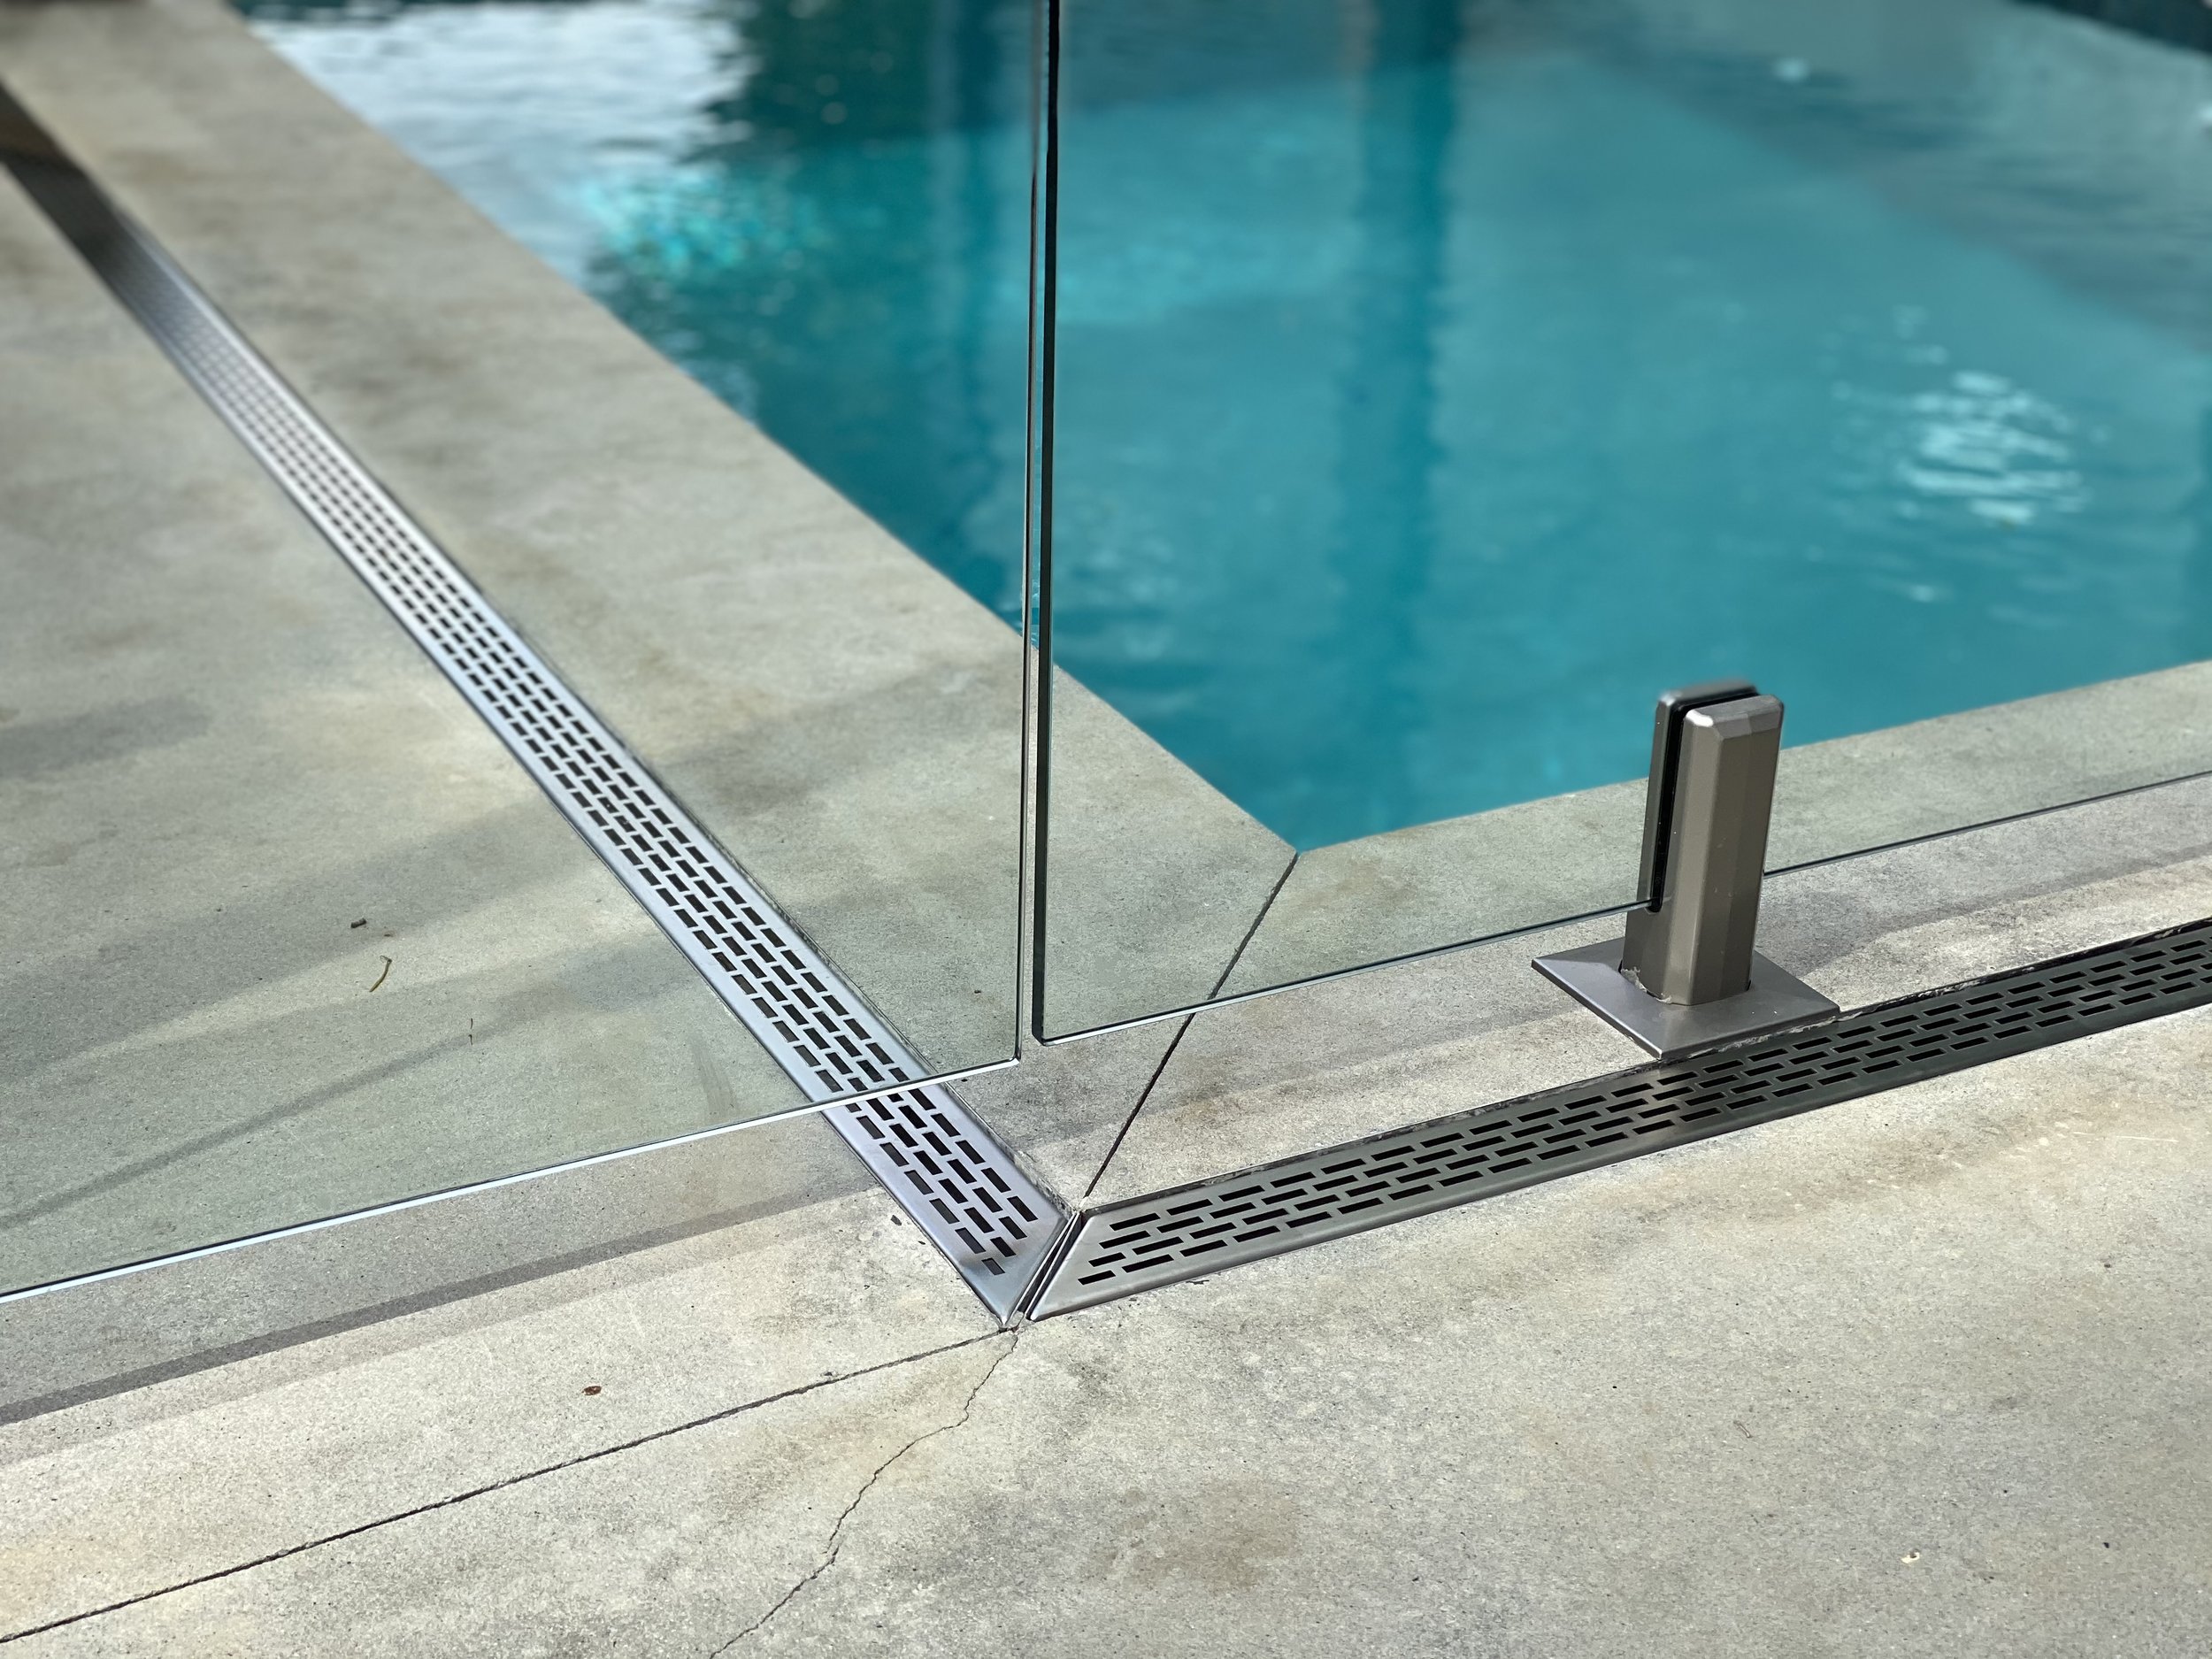
2. LASER CUT POOL SURROUNDS AT MALDON WAY
The first step is to make the sump or tray sub sill whatever you want to call it first.
You then need to secure this in place which can be quite tricky. The most common issue is the tray lifting as the concrete is installed and lightly vibrated.
Make sure you secure it in place with a weight or brace and be sure to tape the waste pipe in case you get wet concrete in there. It’s bad news if this happens.
The major risk with this method is the sump separating from the concrete and the water losing direct flow into the drain.
Our pool surround at Maldon Way is made with custom stainless steel with a laser-cut pattern.


Corner note.
Listen, if you’re going to use concrete, you have to be ready to embrace the imperfections that come with it.
Not only will cutting a 90° degree angle take some precision, but any line cutting into the concrete makes the likelihood of not developing a hairline crack somewhere impossible because you are deliberately disrupting the material.
So, the rule here is, that if you love concrete, love its flaws too.
3. COPPER AT PRESTON POINT ROAD.
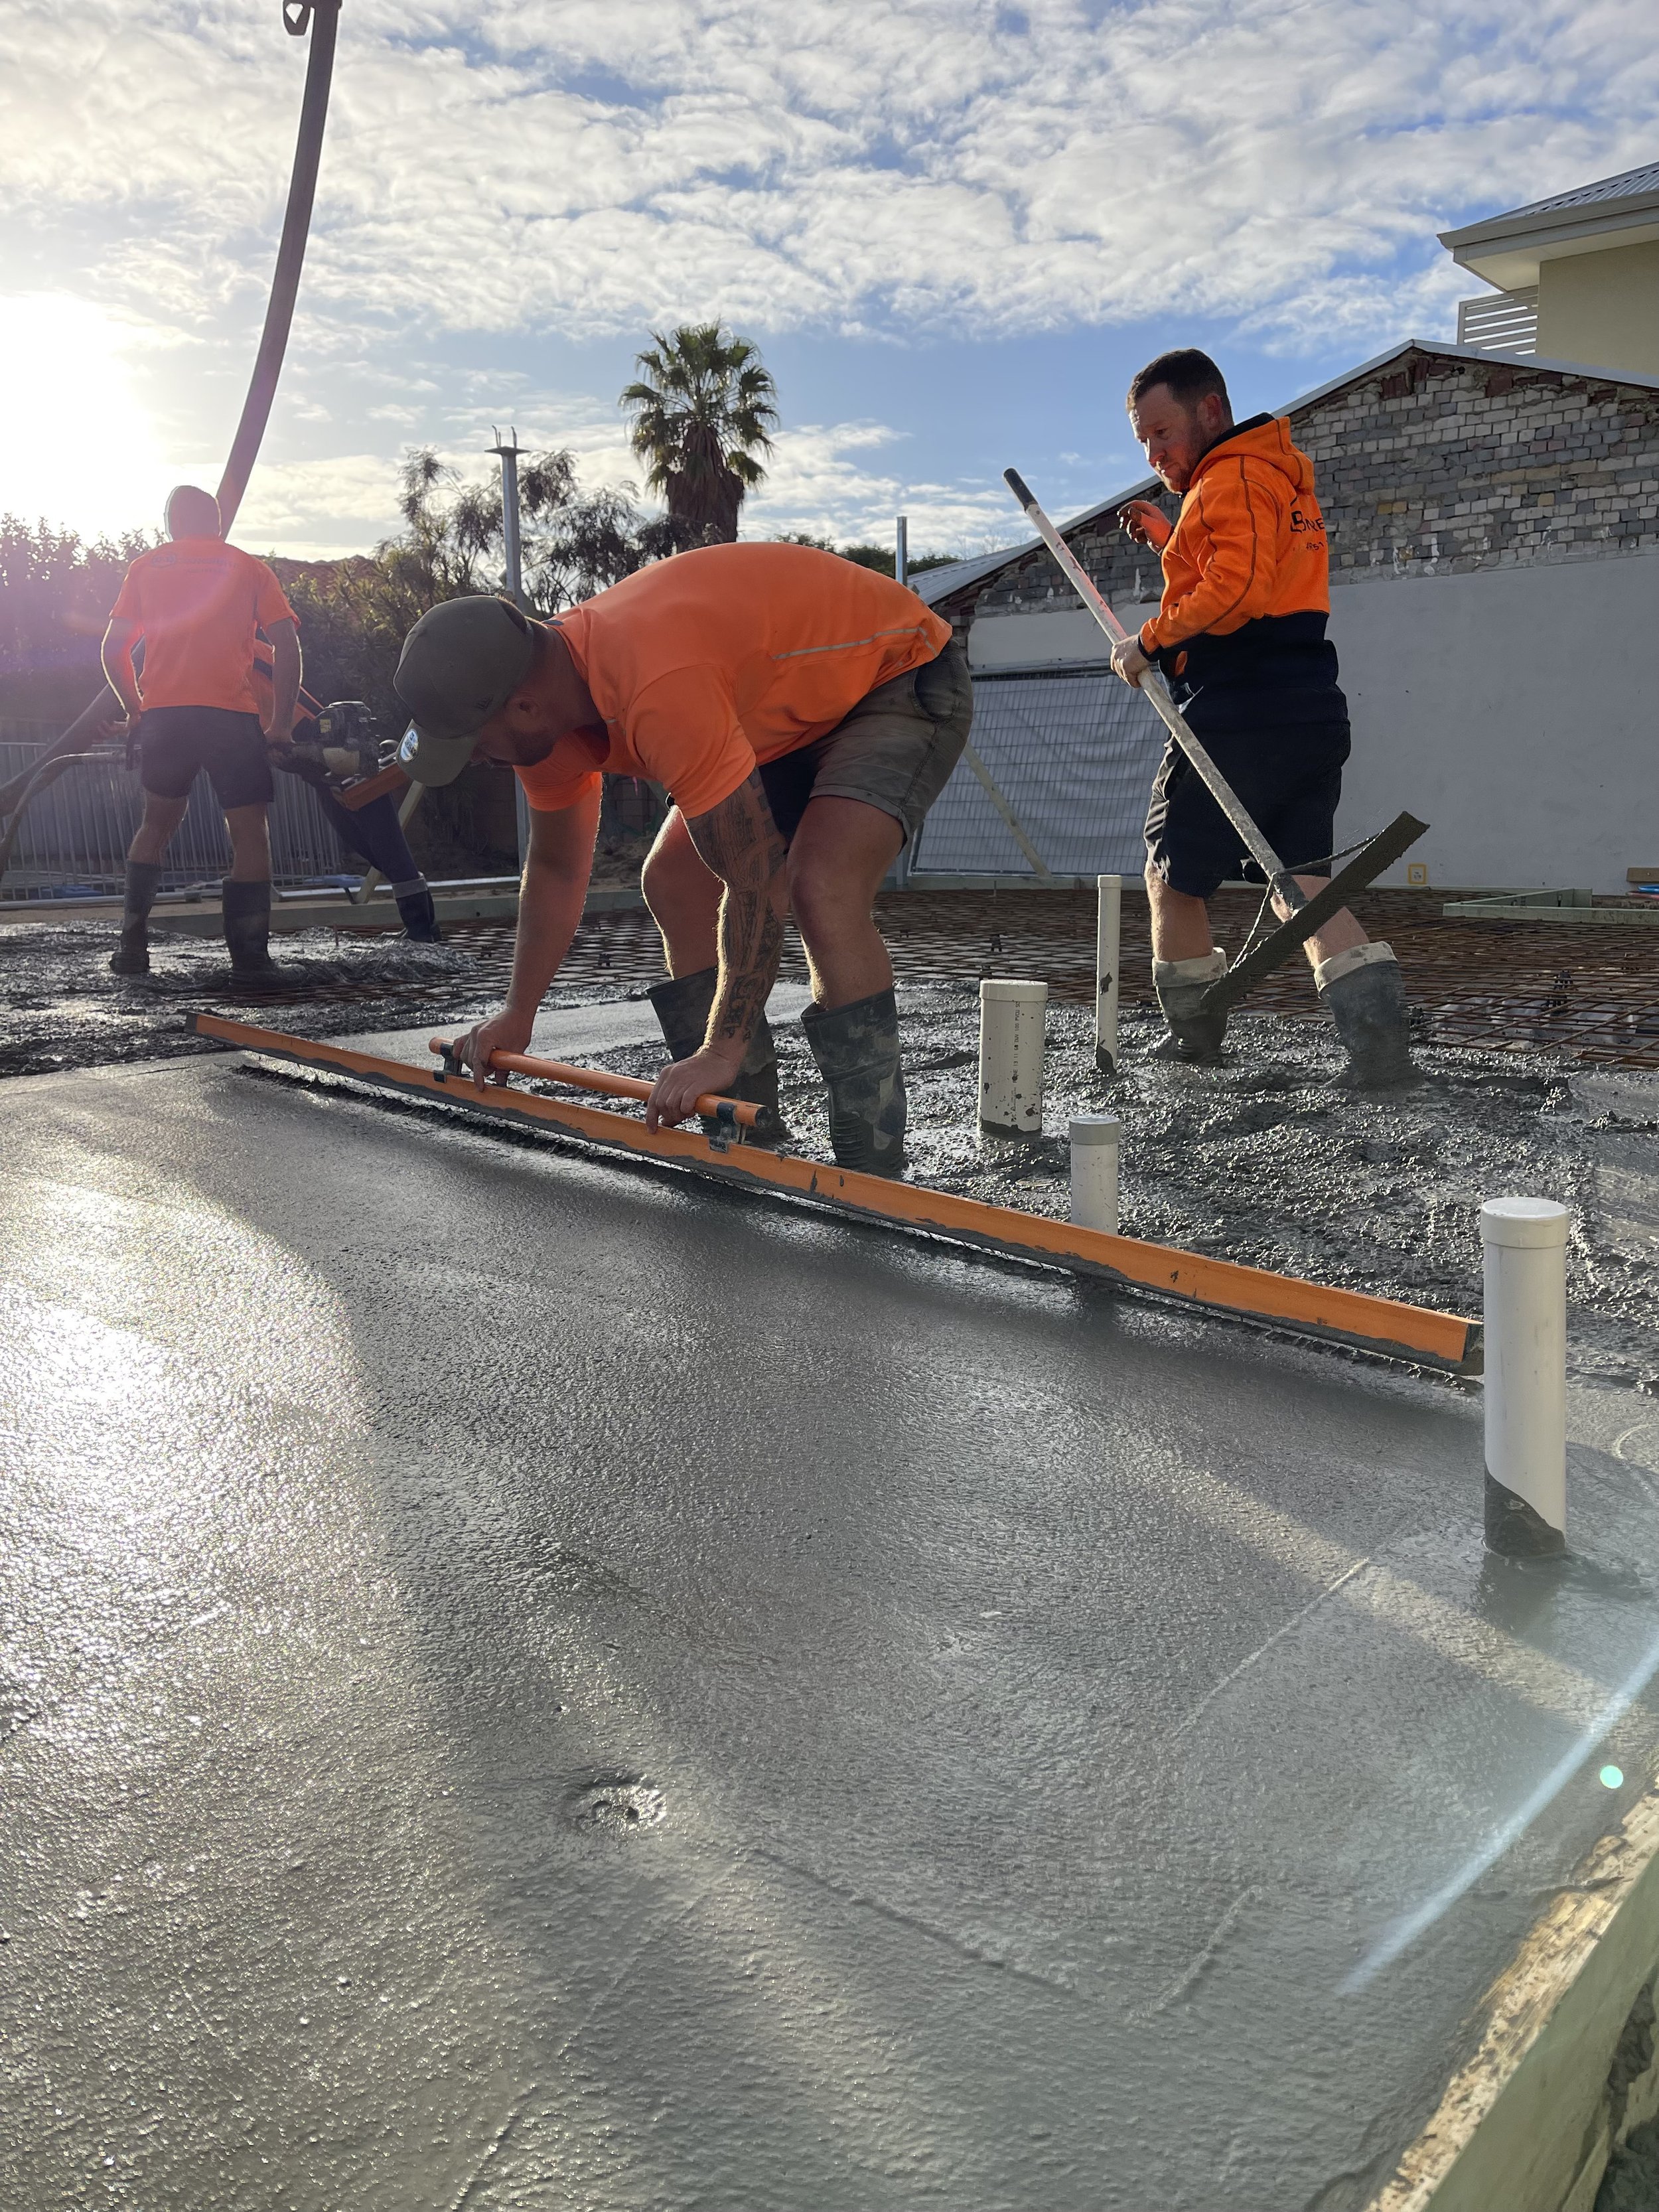
The second method (our preferred) is to form the sump in concrete.
Using timber you can shape the underside to create fall within the sump directly to the drain.
Getting the form out is quite tricky. I don’t use wedges which help with form stripping. We generally do it the ‘hard way’ and cut the timber form out.
Importantly; try to use 40mpa concrete for showers to help with moisture.
You will then need to insert a round waste mainly for aesthetics using the step above.
A custom grate like copper or stainless can be measured and made to suit.
The copper grate below was made out of 20mm pipe and welded together by our respected plumber.


Sharing our trade secrets is something we take genuine pride in.
What can start as a humble post on Instagram can soon develop into many conversations across the industry on best practices. That’s something we won’t ever take for granted.
So, I can leave you with one small take-away from this article, it’s that there is always (mostly) a way to achieve a unique end result. Don’t ever feel you need to conform to a standard as such, just make sure that if you don’t, it always exceeds all expectations in technique, quality, and finish.
In case you missed it - here’s the post that kick-started this very conversation.
As always, we’d encourage you to share this with your friends or industry fellows you feel it may benefit or subscribe to our monthly newsletter.
Cheers, Mark.